TOPS
GROUP BOX
34-469, Birkenhead, Auckland 0746, NZ
TOPS PRODUCTIVITY SPECIALISTS
BLOGGING - creating and maintaining a blog - particularly for cruisers...
Blogging? A horrible name but no more than a personal website geared to broadcast your interests, be that travelling, brewing or pole dancing. For many people, the attraction of a blog is that when travelling, posting a diary of your adventures and even your pictures is a fantastic method of letting all your jealous friends and relatives know what you are up to, without the tedious postcard writing of old. There are several different websites where you can get your blog hosted, but as mine is with "blogspot", it is easier to use that as an example. Since creating it, Google have taken it over and it is now "blogger".
Before I explain how it is done, take a look at a couple of blogs that I created. This will give you a bit of an idea as what is meant by a blog:
Our 2016 Circle Pacific Cruise or back to the first one World Cruise 2011
INDEX LINKS - these links just fast forward on this page:
Emailing straight to your blog
Your email options
GETTING A BLOG STARTED
As always with the internet you need to join up or register and this means selecting a user name and password, so be ready for that. Ideally your password needs to be mix of letters and numbers.
If using Blogger, go to http://www.blogger.com and follow the instructions there to register and create a blog. Once you have done that, add it to your internet favourites. (As with most areas of computers and just like your PC itself, you can split your favourites into groups, such as travel, health, news, etc.)
The alternative blog package is Wordpress and having had a quick look at their site, it appears they have a simple 10 step plan to creating your blog with them. It will be up to you where you post the blog.
Hopefully you will now have registered, sorted out your user name, and a title for your blog as the on line instructions are fairly straightforward. The site has several "help" options.
By all means, create a test blog, keep the name simple and have a play - and then delete it later! Take note of your blog's web address - http:// is going to preface every website and your blog is going to be your website. So the address must begin with http://yourtitle - your title must be unique so choose something fairly simple as there are millions of blogs already out there! The end of the address is going to be common as you are hosting it on blogger, so your final web address must then be: http://yourtitle.blogger.com
Try connecting to your blog!
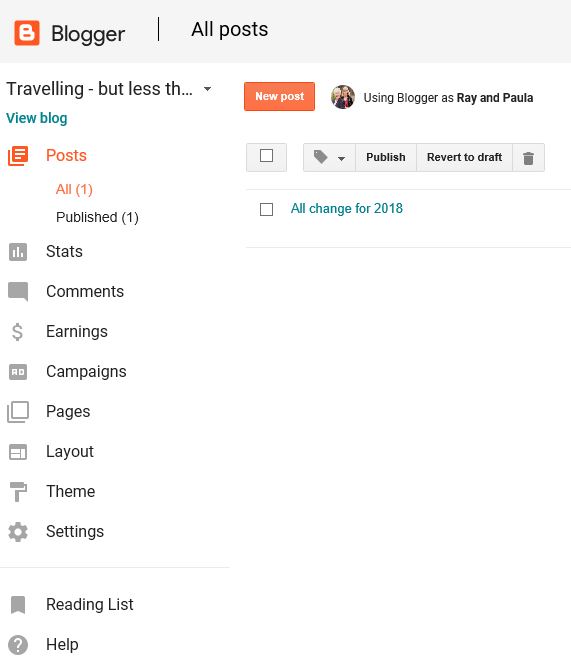
You will either get the blog or you will get the 'dashboard'. To get to the dashboard - which is your access to actually dealing with your blog as opposed to viewing it, you'll need to sign in. THe left hand side should look something like this.
CREATING POSTS OR ADDING TO YOUR BLOG - text
This is where it all can get a bit confusing or expensive (if on a cruise) or both. There are two main options here, on line and off line.
ON LINE POSTS
On line means quite simply that you are connected to the internet, to the blog website and if like me you are a slow typist or a ham fisted one, constantly hitting the wrong keys and having to make corrections, then the time you are connected, particularly on a cruise ship, is going to be very, very expensive. You could access it by hitting the orange "NEW POST" tab as highlighted in the above pic - but that is the expensive option... OK from home but not advised when travelling or paying for internet usage.
OFF LINE POSTS
Off line means that you can create your contribution on a lap top or a PC, at your leisure. You can create it in your favourite Word processing programme such as Word for example, so you can obviously run the spell checker over it. Time is not then an issue as you are not paying for the internet connection time.
Or, you can write it up directly in your normal Email programme - this is my preferred method as if your email format is HTML rather than text, you can choose your own typeface and colour - my preference is 'Comic Sans' 14pt size. See below.
Obviously, off line is going to be the most sensible and the cheapest if you are having to pay for a connection, so we'll concentrate on that, but we may have to return to the 'on line' for a bit of tidying up, but that will be via the "Edit Posts" link.
Still to be updated 2018:
EMAILING STRAIGHT TO YOUR BLOG
To actually post your email direct to your blog, you will need to know your blog's email address. This should be ????@blogger.com where ???? is the email address you can create by clicking on the Settings tab followed by email/mobile. Take a note of that address and add it to your address book before you forget it! (Wordpress has a similar option.)
From now on, I will assume that you have created a blog and also set up your email address as above, either with Blogspot or Wordpress.
If you are lost or I haven't explained anything properly, click on the CONTACT tab at the top of the page and send me an email and I'll try and correct what I have written so far.
YOUR EMAIL - may be a bit basic for some!
If you are very new, have a quick look at this page first - new to email. It may also help you.
There are two major options regarding regarding posting your blog via email (well, two that must be considered at the moment anyway...)
I use Outlook rather than Outlook Express, but most email programmes should have the same options. Open a new email and there is usually a box at the top labelled "Options" - right click on this and it gives you funnily enough, options! Click on your preference. If at home and you are blogging with a decent internet connection, then most people will click on "HTML". If you are on a slow dial up at home or on a ship, then click on the "Plain text".
Option 1: Send a text email - which is the fastest and cheapest method. Plain text only so that it looks like this in your email as you type it.
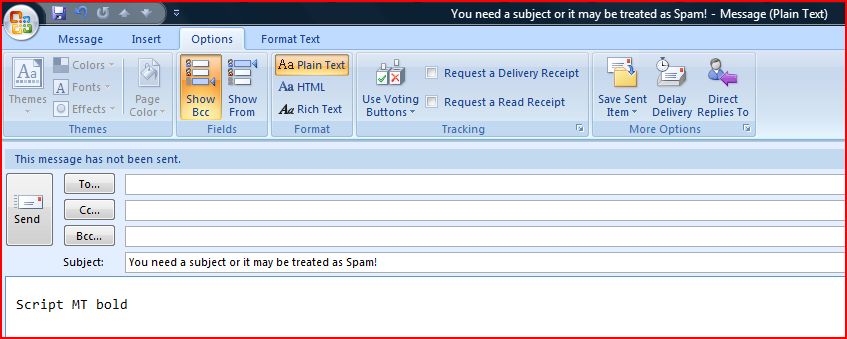 |
This is the standard
typeface for plain text email with no bold lettering, underlining or
fancy type faces.
|
Option 2: Send an email in HTML
Don't worry about this it merely stand for "Hot Metal" - ironic
really and possibly a throwback to the days of lead type.
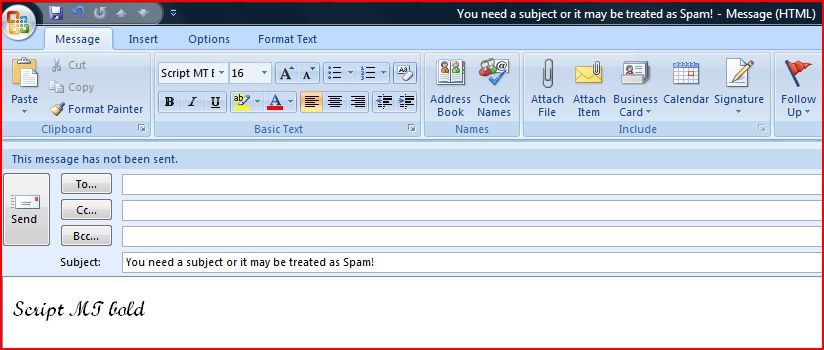 |
Using this option, you have several choices and one of those is the choice of typeface or font plus you can use colours, Bold, Underlining and Italic or any combination. Common fonts are Times Roman (often the default typeface), Arial which is my preferred typeface and the typeface used in this website most of the time. My other favourite is Comic Sans - which is understandable for those who know me but is a little more informal.To change the font, where the box in the image underneath the "Options" tab, shows Script MT", there is a little drop down arrow. Click on this and it will show all the options. Don't go too fancy.... |
When you receive emails,
the person sending you will have selected one of those options,
which is why some emails come through looking fancy and others are
really plain.
You'll find other options such as the font or typeface and even the
colour. If you want to post to your blog in
Purple or
Blue that is your choice.
Send an email to yourself to practice!
The next hurdle is dealing with those beautiful pictures you have taken.
"One picture is worth a thousand words!" Never was a truer word spoken/written - especially when it comes to the cost of posting blogs...
Two sessions here:
Taking photographs & Post picture taking.... Click on the buttons at the top of the page.
Copyright © 2022 TOPS Group All Rights Reserved